打造甲方私有的多级CA证书中心(中)
接上一篇:
接下来是按规划设计,进入到具体安装配置和操作过程。

笔者:国际认证信息系统审计师、软考系统分析师
笔者选择使用ROCKY LINUX 8(RHEL 8的社区版)作为内部CA证书中心的操作系统平台。
由于内部CA证书中心需要高度保护,因此按安全因素最小化去考虑整个安装过程。
首先是安装方式,选择最小安装即可,其它基本上按默认。当然如果需要更高的保护,可以参考笔者之前的文章,通过配置使用SELINUX安全防护和OpenSCAP安全策略实现对系统的加固:
至于ROCKY LINUX的详细安装过程就不表述了,相关教程随便搜索就有。安装后需要做的事情包括正确配置限制SSH访问,开启FIREWALLD屏蔽端口等等。
EASY-RSA不在ROCKY LINUX 8标准软件仓库中,而是存在于EPEL仓库。因此需要先安装EPEL仓库的配置包,然后安装EASY-RSA软件包:
[root@MYCA /]# dnf install epel-release
[root@MYCA /]# dnf install easy-rsa
基本上就只是两步操作。
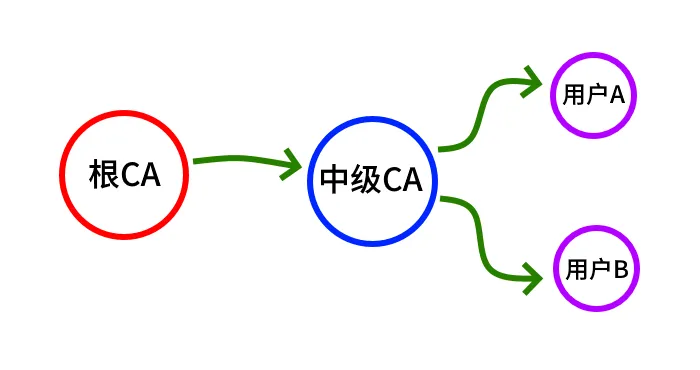
在开始下一步配置前,我们再重温一下如下的多级签发关系图:
通过创建符号链接,使得EASY-RSA的程序和实际数据之间分离,且确保了系统内只有一份EASY-RSA的程序,不用担心多个副本的存在会导致版本更新后,需要手工维持副本之间版本一致性的问题。
1、创建操作目录和符号链接
[root@MYCA /]# useradd ca
[root@MYCA /]# su - ca
[ca@MYCA ~]$ mkdir ~/easy-rsa
[ca@MYCA ~]$ ln -s /usr/share/easy-rsa/3/* ~/easy-rsa/
2、修改目录属性确保安全性
[ca@MYCA ~]$ chmod 700 ~/easy-rsa
3、初始化基本数据文件结构
[ca@MYCA ~]$ cd ~/easy-rsa
[ca@MYCA easy-rsa]$ ./easyrsa init-pki

init-pki complete; you may now create a CA or requests.
Your newly created PKI dir is: /home/ca/easy-rsa/pki
4、创建CA根证书私钥和公共证书。首先创建常用属性文件,配置常用属性,然后创建CA。
[ca@MYCA easy-rsa]$ echo -e "set_var EASYRSA_REQ_COUNTRY \"CN\" \n\
set_var EASYRSA_REQ_PROVINCE \"GUANGDONG\" \n\
set_var EASYRSA_REQ_CITY \"GUANGZHOU\" \n\
set_var EASYRSA_REQ_ORG \"MyCompany\" \n\
set_var EASYRSA_REQ_EMAIL \"Admin@MyCompany.CN\" \n\
set_var EASYRSA_REQ_OU \"Information Center\" \n" > vars
[ca@MYCA easy-rsa]$ ./easyrsa build-ca
Using SSL: openssl OpenSSL 1.1.1k  FIPS 25 Mar 2021

Enter New CA Key Passphrase: 输入私钥密码
初始化期间会如上提示输入密码。密码用于保护私钥,务必足够强壮,且要稳妥记录。每次操作签发或撤回证书,都需要输入私钥密码。
如果不希望有密码,可以通过nopass参数实现,即:
[ca@MYCA easy-rsa]$ ./easyrsa build-ca nopass
输入密码后即生成私钥:
Generating RSA private key, 2048 bit long modulus (2 primes)
......+++++
............................+++++
e is 65537 (0x010001)
You are about to be asked to enter information that will be incorporated
into your certificate request.
What you are about to enter is what is called a Distinguished Name or a DN.
There are quite a few fields but you can leave some blank
For some fields there will be a default value,
If you enter '.', the field will be left blank.
-----
Common Name (eg: your user, host, or server name) [Easy-RSA CA]:MyCA
然后提示输入证书信息。在前面vars脚本文件里面设置的参数会被自动引用,因此只需要输入关键的Common Name。操作完成后,~/easy-rsa/pki/ca.crt 和 ~/easy-rsa/pki/private/ca.key,这两个最重要的文件,也就是根证书中心的公共证书和私钥就创建完毕:
CA creation complete and you may now import and sign cert requests.
Your new CA certificate file for publishing is at:
/home/ca/easy-rsa/pki/ca.crt
5、检查确认私钥文件属性,确保私钥不能随意读写(正常情况不需要这一步):
[ca@MYCA easy-rsa]$ chmod 600 ~/easy-rsa/pki/private/ca.key
因为公钥证书文件ca.crt需要传出CA服务器,因此设置合适的文件属性:
[ca@MYCA easy-rsa]$ chmod 644 ~/easy-rsa/pki/ca.crt
6、公共证书需要导入到企业组织内部所有需要验证内部CA签发的证书的终端系统、终端软件(浏览器)。如果要查看其内容,可以执行如下命令查看:
[ca@MYCA easy-rsa]$ openssl x509 -noout -text -in ./pki/ca.crt
私钥不能传出CA中心服务器,不能在命令行直接显示文件内容。如果私钥文件泄露,整个CA都需要推倒重建。
作为示例这里只创建1个中级证书用户。实际环境中,我们在上一篇文章说过应该创建多个中级证书用户,比如专门为网络设备管理界面创建一个。中级证书用户也可以和内部域名的域定义相结合。总之,规则是自己定的,有一定科学性、可持续就行。
1、首先我们要退回到root用户,然后开始创建中级证书用户,并添加根证书用户到中级证书用户的用户组,修改目录属性允许同组用户访问:
[root@MYCA /]# useradd intermediate
[root@MYCA /]# usermod -a -G intermediate ca
[root@MYCA /]# chmod 770 /home/intermediate
用户是否需要真实启用(解锁、设置密码),视乎网络安全要求、实际操作人员情况而定。如果所有事情都是一个人,那就没必要了。
2、切换到中级证书用户,然后创建EASY-RSA符号链接、数据结构、环境参数设置等:
[root@MYCA /]# su - intermediate
[intermediate@MYCA ~]$ mkdir ~/easy-rsa
[intermediate@MYCA ~]$ ln -s /usr/share/easy-rsa/3/* ~/easy-rsa/
[intermediate@MYCA ~]$ chmod 770 ~/easy-rsa
[intermediate@MYCA ~]$ chmod 770 ~/easy-rsa/pki
[intermediate@MYCA ~]$ cd ~/easy-rsa
[intermediate@MYCA easy-rsa]$ ./easyrsa init-pki

init-pki complete; you may now create a CA or requests.
Your newly created PKI dir is: /home/intermediate/easy-rsa/pki

[intermediate@MYCA easy-rsa]$ echo -e "set_var EASYRSA_REQ_COUNTRY \"CN\" \n\
set_var EASYRSA_REQ_PROVINCE \"GUANGDONG\" \n\
set_var EASYRSA_REQ_CITY \"GUANGZHOU\" \n\
set_var EASYRSA_REQ_ORG \"MyCompany\" \n\
set_var EASYRSA_REQ_EMAIL \"Admin@MyCompany.CN\" \n\
set_var EASYRSA_REQ_OU \"Information Center\" \n" > vars
[intermediate@MYCA easy-rsa]$ ./easyrsa build-ca subca
Note: using Easy-RSA configuration from: /home/intermediate/easy-rsa/pki/vars
Using SSL: openssl OpenSSL 1.1.1k FIPS 25 Mar 2021
Enter New CA Key Passphrase: 输入中级CA私钥密码
Re-Enter New CA Key Passphrase: 再输入一次
Generating RSA private key, 2048 bit long modulus (2 primes)
..........................................................................+++++
............................................................................................+++++
e is 65537 (0x010001)
You are about to be asked to enter information that will be incorporated into your certificate request.
What you are about to enter is what is called a Distinguished Name or a DN.
There are quite a few fields but you can leave some blank
For some fields there will be a default value,
If you enter '.', the field will be left blank.
-----
Common Name (eg: your user, host, or server name) [Easy-RSA CA]:输入中级证书机构名称,比如MyInterCA
NOTE: Your intermediate CA request is at /home/intermediate/easy-rsa/pki/reqs/ca.req
and now must be sent to your parent CA for signing. Place your resulting cert at /home/intermediate/easy-rsa/pki/ca.crt prior to signing operations.
上述过程创建出需要由根CA签发的签名请求文件ca.req。其内容可以通过如下参数的命令查看:
[intermediate@MYCA easy-rsa]$ openssl req -noout -text -in ~/easy-rsa/pki/reqs/ca.req
由于要被CA用户操作,因此需要修改属性:
[intermediate@MYCA ~]$ chmod 770 ~/easy-rsa/pki/reqs
[intermediate@MYCA ~]$ chmod 640 ~/easy-rsa/pki/reqs/ca.req
3、开始签发中级证书的操作。首先是在root用户下切换到ca根证书用户,然后导入中级CA的签名请求文件:
[root@MYCA /]# su - ca
[ca@MYCA ~]$ cd ~/easy-rsa
[ca@MYCA easy-rsa]$ ./easyrsa import-req /home/intermediate/easy-rsa/pki/reqs/ca.req intermediate
Using SSL: openssl OpenSSL 1.1.1k FIPS 25 Mar 2021
The request has been successfully imported with a short name of: intermediate
You may now use this name to perform signing operations on this request.
4、提示成功导入后,通过根CA签发中级CA证书:
[ca@MYCA easy-rsa]$ ./easyrsa sign-req ca intermediate
Using SSL: openssl OpenSSL 1.1.1k FIPS 25 Mar 2021
You are about to sign the following certificate.
Please check over the details shown below for accuracy. Note that this request has not been cryptographically verified. Please be sure it came from a trusted source or that you have verified the request checksum with the sender.
Request subject, to be signed as a ca certificate for 825 days:
subject=
commonName = MyInterCA
Type the word 'yes' to continue, or any other input to abort.
Confirm request details: 输入yes确认操作
Using configuration from /home/ca/easy-rsa/pki/easy-rsa-15310.Rjf8m5/tmp.q1ECVu
Enter pass phrase for /home/ca/easy-rsa/pki/private/ca.key: 输入根CA私钥密码
Check that the request matches the signature
Signature ok
The Subject's Distinguished Name is as follows
commonName :ASN.1 12:'MyInterCA'
Certificate is to be certified until Nov 27 15:36:44 2024 GMT (825 days)
Write out database with 1 new entries
Data Base Updated
Certificate created at: /home/ca/easy-rsa/pki/issued/intermediate.crt
这样就生成了中级证书。
5、然后把生成的中级证书复制回去中级CA相应文件夹内,复制的同时修改文件名,然后设置合适的文件访问属性:
[ca@MYCA easy-rsa]$ cp /home/ca/easy-rsa/pki/issued/intermediate.crt /home/intermediate/easy-rsa/pki/ca.crt
[ca@MYCA easy-rsa]$ chmod 644 /home/intermediate/easy-rsa/pki/ca.crt
6、如果要查看证书,可以执行如下命令:
[ca@MYCA easy-rsa]$ openssl x509 -noout -text -in /home/ca/easy-rsa/pki/issued/intermediate.crt
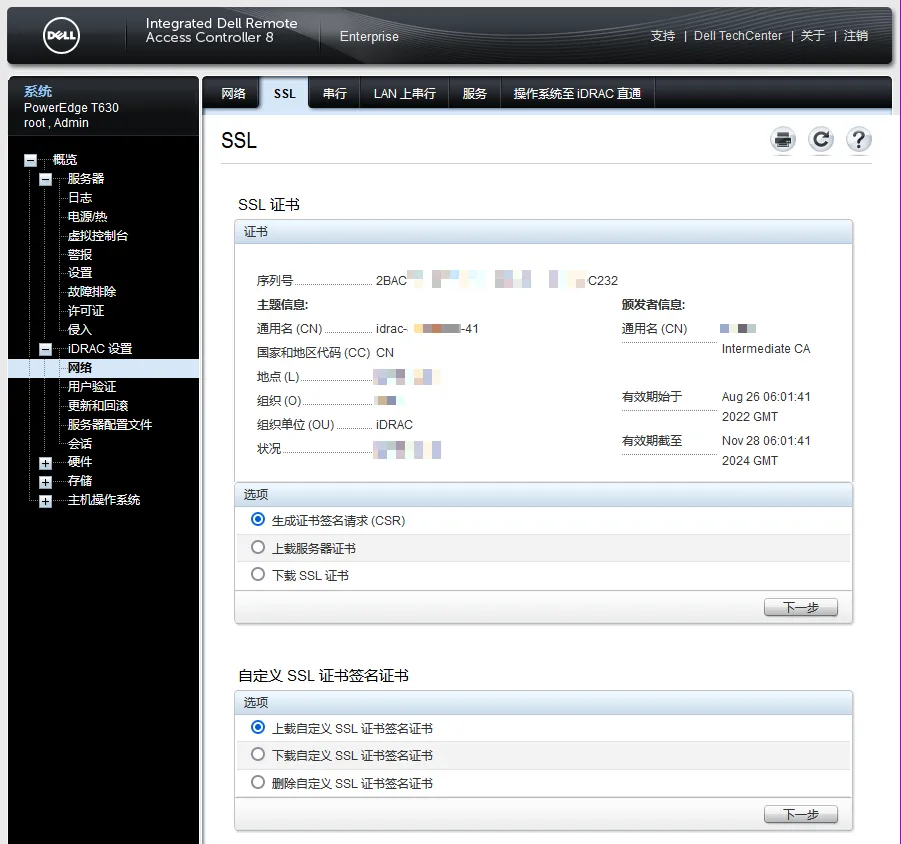
下面我们通过对某品牌服务器的嵌入式管理界面配置自己签发的证书的过程作为说明。
1、首先通过服务器的嵌入式管理界面的功能,生成签名请求CSR文件:

下载得到CSR文件,简单地命名为:idrac.csr
2、在CA服务器创建用于传入CSR、传出证书的用户,设置中级证书用户与其同组:
[root@MYCA /]# useradd transfer
[root@MYCA /]# chmod 770 /home/transfer
[root@MYCA /]# usermod -a -G transfer intermediate
3、通过WINSCP之类的SCP软件,把CSR文件上载到/home/transfer后,设置访问属性为640,然后切换到中级CA用户,通过中级CA进行证书签发:
[root@MYCA /]# su - intermediate
[intermediate@MYCA ~]$ cd easy-rsa/
[intermediate@MYCA easy-rsa]$ ./easyrsa import-req /home/transfer/idrac.csr idrac1

Note: using Easy-RSA configuration from: /home/intermediate/easy-rsa/pki/vars
Using SSL: openssl OpenSSL 1.1.1k FIPS 25 Mar 2021
The request has been successfully imported with a short name of: idrac1
You may now use this name to perform signing operations on this request.
上面过程中,idrac1是导入后的证书的名字。这个名字可以随便起,我建议最佳实践是基于设备的产品序列号或者MAC地址,这样容易区分。
4、签发证书:
[intermediate@MYCA easy-rsa]$ ./easyrsa sign server idrac1
Note: using Easy-RSA configuration from: /home/intermediate/easy-rsa/pki/vars
Using SSL: openssl OpenSSL 1.1.1k FIPS 25 Mar 2021
You are about to sign the following certificate.
Please check over the details shown below for accuracy. Note that this request has not been cryptographically verified. Please be sure it came from a trusted source or that you have verified the request checksum with the sender.
Request subject, to be signed as a server certificate for 825 days:
subject=
countryName = CN
stateOrProvinceName = GUANGDONG
localityName = GUANGZHOU
organizationName = MyCompany
organizationalUnitName = iDRAC
commonName = idrac1
emailAddress = Admin@MyCompany.CN
X509v3 Subject Alternative Name:
DNS:idrac1
Type the word 'yes' to continue, or any other input to abort.
Confirm request details: 输入yes确认操作
Using configuration from /home/intermediate/easy-rsa/pki/easy-rsa-16391.vRLL9j/tmp.rpKDhB
Enter pass phrase for /home/intermediate/easy-rsa/pki/private/ca.key: 输入中级CA私钥密码
Check that the request matches the signature
Signature ok
The Subject's Distinguished Name is as follows
countryName :PRINTABLE:'CN'
stateOrProvinceName :ASN.1 12:'GUANGDONG'
localityName :ASN.1 12:'GUANGZHOU'
organizationName :ASN.1 12:'MyCompany'
organizationalUnitName:ASN.1 12:'iDRAC'
commonName :ASN.1 12:'idrac1'
emailAddress :IA5STRING:'Admin@MyCompany.CN'
Certificate is to be certified until Nov 28 06:01:41 2024 GMT (825 days)
Write out database with 1 new entries
Data Base Updated
Certificate created at: /home/intermediate/easy-rsa/pki/issued/idrac1.crt
5、把证书复制回去传输用户的文件夹,并设置属性使能复制传出CA服务器:
[intermediate@MYCA easy-rsa]$ cp ~/easy-rsa/pki/issued/idrac1.crt /home/transfer/idrac.crt
[intermediate@MYCA easy-rsa]$ chmod 640 /home/transfer/idrac.crt
6、随后,用WINSCP软件从CA服务器登录下载idrac.crt证书文件,再通过idrac界面上载、应用。
最后用浏览器重新打开服务器的嵌入式管理界面,检查关于证书的提示。需要注意浏览器会对不明的证书签发给出告警,需要添加例外接受,或者对浏览器设置导入私有CA的根证书和中级证书。

为和第五部分内容有所区分,我另外创建一个专门用于传出的用户:
[root@MYCA /]# useradd export
[root@MYCA /]# chmod 770 /home/export
[root@MYCA /]# usermod -a -G export intermediate
切换到传出用户,创建私钥和签名请求:
[root@MYCA /]# su - export
[export@MYCA ~]$ openssl genrsa -out server1.key
[export@MYCA ~]$ openssl req -new -key server1.key -out server1.req
然后再切换到中级CA用户,导入签名请求,然后签发证书,注意server1是自己给的名字:
[root@MYCA /]# su - intermediate
[intermediate@MYCA ~]$ cd easy-rsa/
[intermediate@MYCA ~]$ ./easyrsa import-req /home/export/server1.req server1
过程输出如下:
Note: using Easy-RSA configuration from: /home/intermediate/easy-rsa/pki/vars
Using SSL: openssl OpenSSL 1.1.1k FIPS 25 Mar 2021
The request has been successfully imported with a short name of: server1
You may now use this name to perform signing operations on this request.
[intermediate@MYCA easy-rsa]$ ./easyrsa sign-req server server1
Note: using Easy-RSA configuration from: /home/intermediate/easy-rsa/pki/vars
Using SSL: openssl OpenSSL 1.1.1k FIPS 25 Mar 2021
You are about to sign the following certificate.
Please check over the details shown below for accuracy. Note that this request has not been cryptographically verified. Please be sure it came from a trusted source or that you have verified the request checksum with the sender.
Request subject, to be signed as a server certificate for 825 days:
subject=
countryName = CN
stateOrProvinceName = Guangdong
localityName = Guangzhou
organizationName = MyCompany
organizationalUnitName = Information System
commonName = server1.MyCompany
emailAddress = Admin@MyCompany.CN
Type the word 'yes' to continue, or any other input to abort.
Confirm request details: 输入yes确认操作
Using configuration from /home/intermediate/easy-rsa/pki/easy-rsa-15621.GBvjjo/tmp.lsxz8u
Enter pass phrase for /home/intermediate/easy-rsa/pki/private/ca.key: 输入中级CA私钥密码
Check that the request matches the signature
Signature ok
The Subject's Distinguished Name is as follows
countryName :PRINTABLE:'CN'
stateOrProvinceName :ASN.1 12:'Guangdong'
localityName :ASN.1 12:'Guangzhou'
organizationName :ASN.1 12:'MyCompany'
organizationalUnitName:ASN.1 12:'Information System'
commonName :ASN.1 12:'server1.MyCompany'
emailAddress :IA5STRING:'Admin@MyCompany.CN'
Certificate is to be certified until Nov 27 16:33:11 2024 GMT (825 days)
Write out database with 1 new entries
Data Base Updated
Certificate created at: /home/intermediate/easy-rsa/pki/issued/server1.crt
证书生成后,复制回去export用户,设置文件访问属性:
[intermediate@MYCA ~]$ cp /home/intermediate/easy-rsa/pki/issued/server1.crt /home/export/server1.crt
[intermediate@MYCA ~]$ chmod 664 /home/export/server1.crt
随后用WINSCP之类的SCP软件,登录CA服务器,复制传出server1.key和server1.crt。必须说的是,后面的证书部署过程,务必注意私钥的安全性。
基本上我们就完成了这一甲方内部私有的证书中心的全过程设置。下一篇介绍的将是一些扩展性的内容,以及EASY-RSA的其它一些比较少被关注的操作。
本站微信订阅号:

本页网址二维码: